We all know vinegar is a staple in cooking and cleaning without chemicals, but what exactly is it, and how can we make it at home while simultaneous helping to eliminate food waste and its negative effects when it ends up in a landfill?
Vinegar comes from the Latin words Vinum (wine) and Acer (Sour), and sour wine is exactly what it is; wine in which the alcohol has been transformed by various air loving bacteria into acids and has most likely been made (whether purposely or accidentally) since humans discovered alcoholic fermentation.
The first mention of vinegar was around 3000 BC when Babylonians used the fruit and sap of the date palm to brew date wine which was then left in contact with air, it was not until 1862 that famed French Chemist and microbiologist Louis Pasteur (who also developed and gave his name to
pasteurisation) discovered and named the bacteria responsible for turning alcohol into acetic acid (Mycoderma Aceti).
So, what makes this such a perfect product to use up fruit waste?
Well, if you’ve ever fermented anything you’re already halfway there! All that’s left to do is introduce it to air and the right bacteria and we can create gorgeous healthy vinegar to use to your heart’s desire.
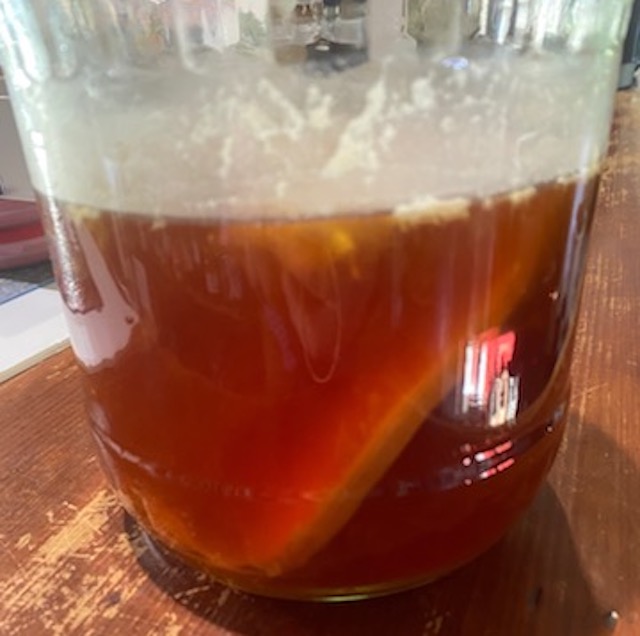
There are, broadly speaking, two types of vinegar production the first involves using wooden chips to aerate and inoculate the alcoholic liquid, usually wine or other fermented products, though even distilled spirits can be used if additional nutrients are added. The second (which we will be using) is to add the fruit, sugar and vinegar bacterium which I find to be much more convenient on smaller scales and requires no specialised equipment.
Some of our favourite ways to use our vinegar both raw and pasteurised (see that tangent was coming around again) are Health tonics like Switchel, fire tonic, pickling, chutney and preserves, casseroles, marinades, mustards, flying insect control and cleaning.
It’s such a versatile product for something you can make from fruit and vegetable scraps and some sugar. This process does take a while to get going if you can’t get your hands on a vinegar mother, which you can get from raw vinegar at most grocers and health food shops, or a spare kombucha SCOBY (which fun fact stands for, symbiotic culture of bacteria and yeast) can provide a perfect kickstart. Although the bacteria can be slightly different they will soon culture the right little bugs for the job.
Enough theory for now, let’s get into making the darned thing.
Homemade fruit vinegar
For about 2 litres you will need:
- Large 2ltr glass jar
- Mesh bag or muslin and kitchen twine
- Medium Weight such as a washed river rock or ceramic weight to keep the solids under the liquid level
- Glass bottles
OR
- Large jar or crock with an airlock
- CHUX’s and rubber band
- Glass bottles
Ingredients:
- 1-2 cups fruit scraps (cores and skins, anything without mould) or 2nds cut into small chunks, this can also be leftover pineapple skin from making tepache.
- ½ – 1 cup sugar source ie. raw or Rapadura sugar, honey, maple, or agave syrup, use whatever is most sustainable in your area remembering very little sugar ends up in the final product.
- Vinegar mother or SCOBY and ½ cup raw vinegar or kombucha.
- Unchlorinated water to fill.
Method
- Place fruit and weight into your mesh bag if using one.
- Dissolve sugar in a small amount of water, and add your fruit to the jar, followed by your vinegar mother and liquid.
- Fill the jar with the water leaving a space at the top in case of bubbling.
- Either cover the top with CHUX securing with a rubber band or add your airlock lid and fill it with water.
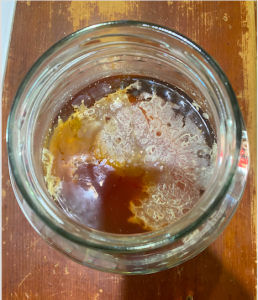
- Allow to ferment for 1 month at around 20-35℃ remove the fruit and re-cover with your CHUX
- Ferment for another 2-4 weeks, tasting weekly until it tastes like vinegar with little to no sweetness.
- Bottle in your glass bottles and store in a cool place or the fridge.
- To pasteurise if desired: add vinegar to a pot and bring to a boil for 5 minutes, allow to cool and then bottle (we usually don’t pasteurise ours to preserve the natural cultures and flavours)
Notes:
If you don’t have vinegar or mother: follow the mesh bag technique leaving the fruit in until a white rubbery layer forms on top and it smells strongly of vinegar. If any mould forms throw out your liquid and try again, this was probably caused by having exposed fruit. This process could take up to 3-months in cooler climates.
Banana peels produce vinegar with a very mucosal texture; it produces very nice chutney, but it can be a little challenging to work with. For your first batch, we recommend apples, pineapples or stone fruit which produce a much cleaner ferment.
Since fruit vinegar work by first making alcohol you can also make them with other alcohols such as beer or wine if you brew your own, simply add your vinegar mother to a jar with your alcohol and cover with a CHUX and leave to sour for a few weeks.
Homemade Pickles
One of the first things you should try with your vinegar is making your own homemade pickles!
They are a fantastic way to use up and preserve fruits and vegetables that might otherwise go to waste, plus you can play around with different sugars, spices, and vinegar to create your own unique flavours for your house pickles.
The recipe below is what we use in our house and can be used with most firm vegetables including cucumbers, carrots, beetroot, radishes, ginger, garlic, or green tomatoes.
You’ll notice that the recipe follows a very simple 1.2.3 formula, 1 part sugar/honey/syrup etc. 2 parts vinegar, and 3 parts water, plus some herbs, spices, and salt to taste and as such can be infinitely scaled to accommodate any sized batch.
For 3 cups of Pickling Solution
Equipment:
- Several wide-mouthed jars with lids
- Saucepan
- Jar funnel (Optional but handy)
Ingredients:
- Vegetables you want to pickle (cut them into slices, sticks, spiralized or leave them whole if using smaller things like baby beetroot or pickling cucumbers.)
- Herbs and spices (such as mustard seeds, turmeric, rosemary, dill, garlic, chillies, coriander seeds and juniper berries just to name a few.)
- ½ cup sugar
- 1 cup vinegar (raw or pasteurised)
- 1 ½ cup water
- Pinch of salt to taste
Method
- Snuggly pack your jars with your vegetables and spices like ginger and garlic.
- Add the remaining ingredients to a saucepan and bring to a boil while stirring to help the sugar dissolve.
- Pour your boiling liquid into your jars over the vegetables, most of them will float so don’t worry if some bob to the top.
- Tightly seal your jars, label them well with tags or we use our label maker, and let them cool at least overnight before eating, though a week or so is better for whole or larger vegetables.
Flavour ideas for you to try:
- Daikon radish and ginger in rice wine vinegar.
- Cucumbers with dill and mustard seed in apple vinegar.
- Ginger thinly sliced in pineapple vinegar.
- Beetroot with juniper berries in beer vinegar.